How to make a Valentine's Day card with a cookie cutter

Show your love and appreciation with a heartfelt, handmade card this Valentine's Day. This easy-to-follow guide will teach you how to make a one-of-a-kind card using a heart-shaped cookie cutter.
What you will need for your Valentine's Day card:
White harder paper or cardboard
Heart-shaped cookie cutter
Paintbrush
Tempera Paints KOH-I-NOOR
Scissors
Masking tape
Decorative elements (gold paint, glitter, gold pen)
Step by step procedure
1. Prepare your workspace
Clear off a table and gather all of your supplies. Having everything organized will make the card-making process quick and easy!
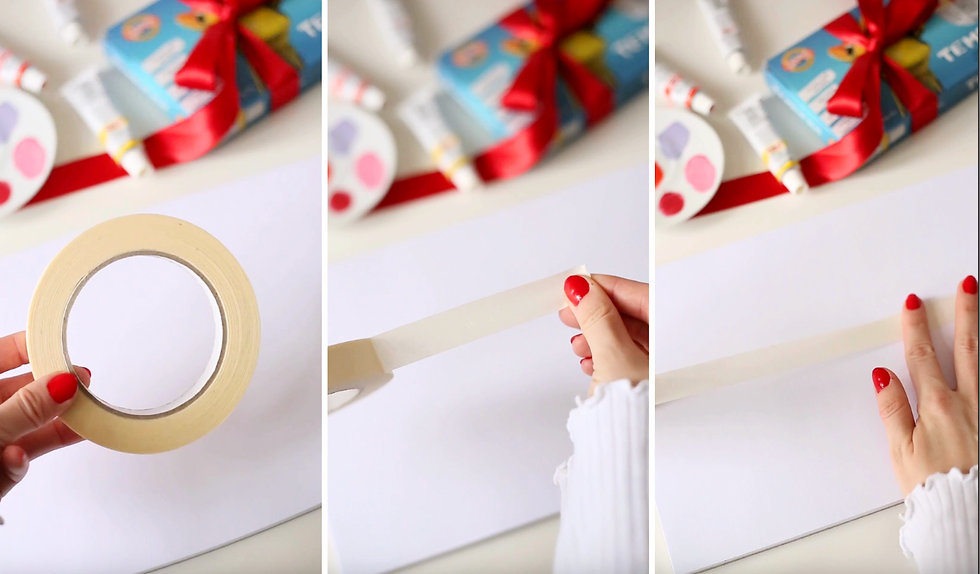
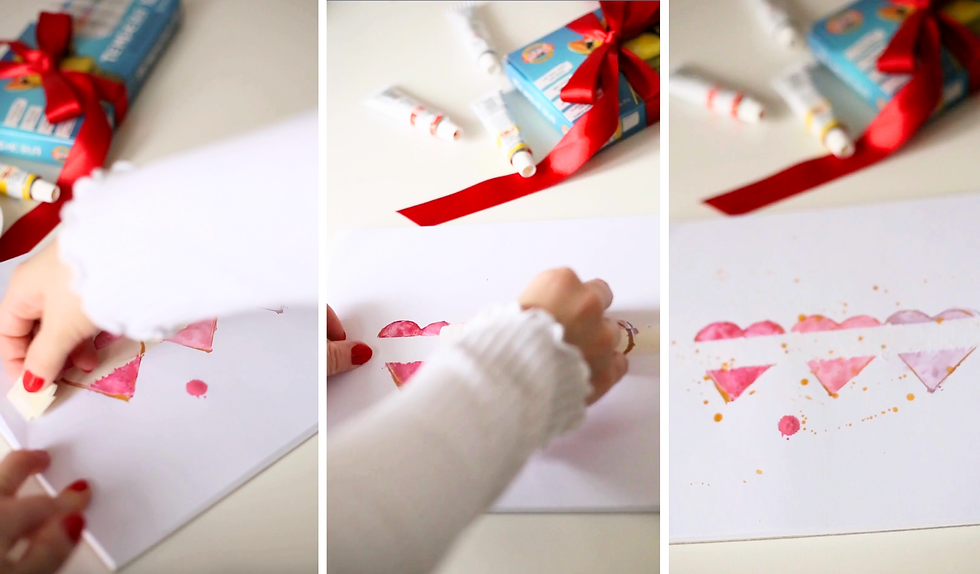
2. Stick the masking tape
Carefully place the masking tape on the white paper, creating a stripe across the center. Once the paint is dry, the tape can be easily removed. Select a tape width that complements the size of your cookie cutter.
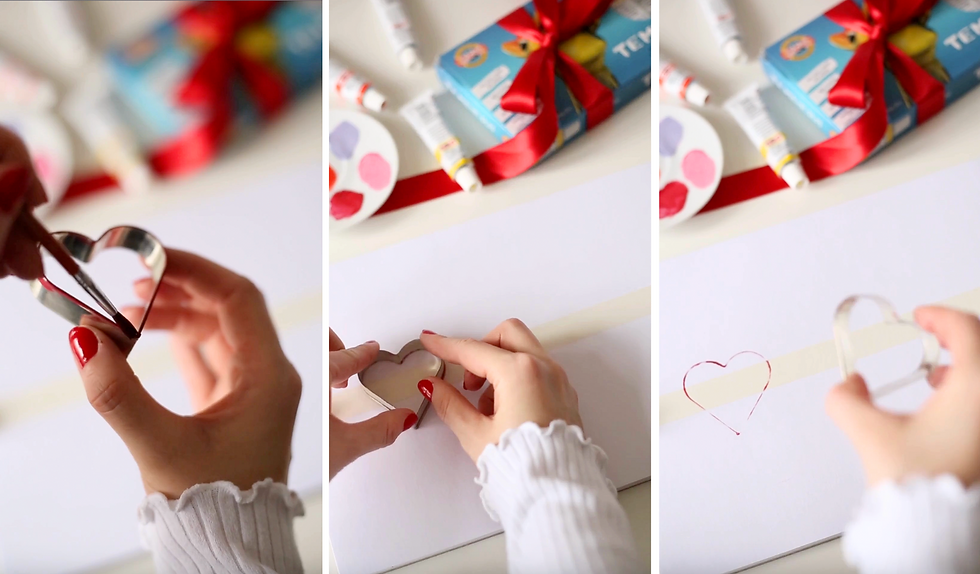
3. Handprint the heart
Apply tempera paint to the cutter's edge and press it onto the paper. Let it dry.
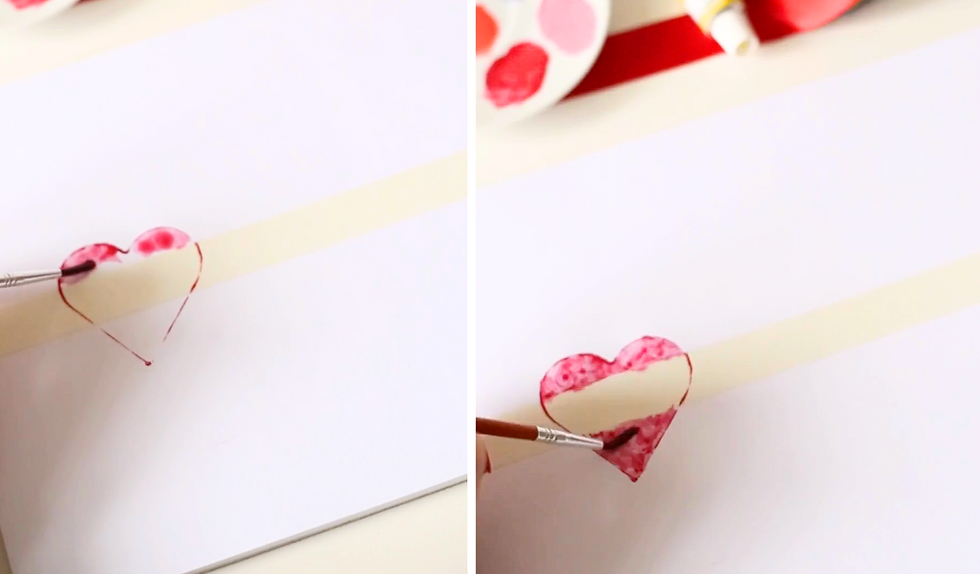
4. Finish painting the heart with a brush
Fill the inside of the heart with the same colour or paint it a different shade you like.
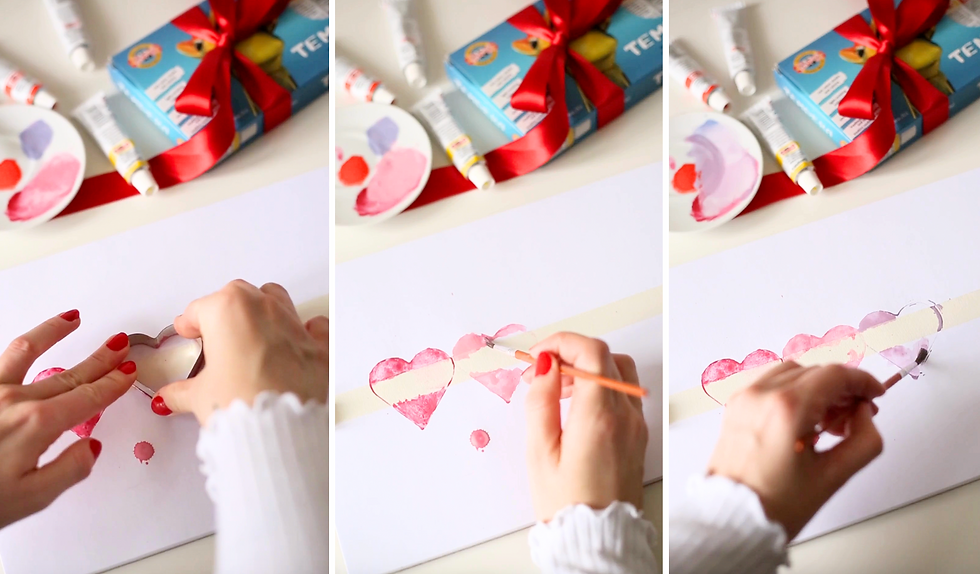
5. Create more hearts
Make a pattern by pressing the hearts next to each other using different colors. Then, randomly color the inside of all the hearts.
6. Add gold outlines or glitter
For extra sparkle, add glitter or gently tap a brush loaded with paint to create tiny flecks around the hearts. Let the finished design dry completely.
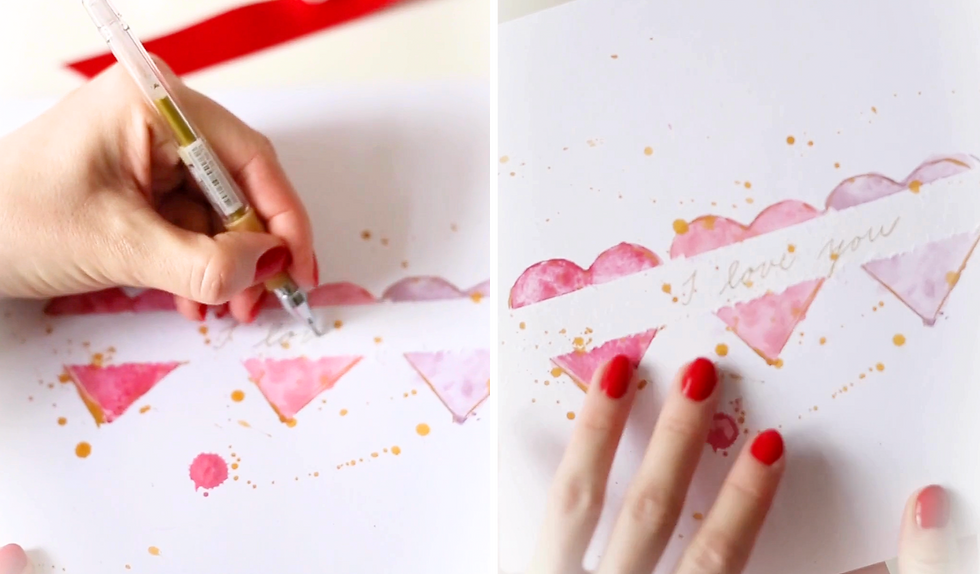
7. Take off the masking tape carefully from your Valentine's Day card
8. Write a personal message on the Valentine's Day card
You can finish it by adding a heartfelt message.
That is all! You have now created your unique valentine. Enjoy the creative process and feel free to share your lovely creations with us!