Easter paper crafts for kids

Easter is here, and for our little artists, we prepared a simple tutorial on gift packages, for example, the Easter ones, that come in handy not only for this holiday.

Firstly, it's necessary to create a paper bag. If you don't dare to make it yourself, it's possible to buy one, though its creation is nothing complicated.

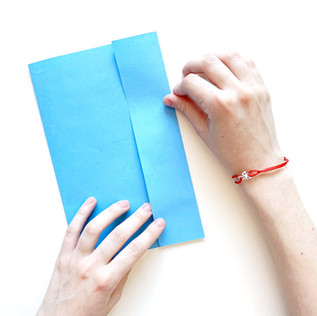
Turn colored paper to the width of its length and fold one side of the paper sheet past half of its width.
Then fold the opposite end of the paper inwards and glue them together.

Turn the paper vertically and fold its downside upwards.
Fold both upper corners of this part downwards in order to create two triangles, one on each side.
Carefully unfold the part you just folded up and fold the bottom side upwards. Do the same with the top side, and then glue it together. Now you have the bottom of the paper bag.

Turn the bag vertically and make a fold about 2 cm wide on each side. Now you just have to spread out the bag and bend inwards the sides you created last.

Having the paper bag folded up, you can start decorating. We've decided on a motif with a cute bunny that we create using colored paper, graphite pencils, a marker, glue, and scissors.

Firstly, use a pencil to trace the paper bag on cardstock paper to know how large you need the motif to be. Then sketch an outline of a bunny.

Cut out the pre-drawn motif.
Afterward, cut out details, such as bunny ears, cheeks, and a muzzle, from sheets of paper of different colors. Glue everything on the bunny outline using stick glue.
Now it's time for popular Twins markers with two tips, a narrow and wide one. Use them to complete the bunny's eyes and whiskers.

Use stick glue to glue the finished motif to the paper bag, and it's done! In the same way, you can create a motif with a cute chick or experiment with other colored papers.

Happy Easter!


Comments